Monday, December 18, 2017

Hitting the Hump

Continuing on in our House-Flipping Adventures, we are at the hump! When we bought the house everything (EV-ER-Y-THING) needed to come out. There wasn't a single thing in the house that was salvageable in its current condition! We started out at the bottom of a very tall, steep hill, and the uphill battle has been exciting and sweaty and messy and gross.  Happily (?) some of the stuff was already removed (like all the doors. Why?), but hauling out nasty innards completely filled up a 40-yard dumpster. Once we had a clean slate, things felt a little more do-able. A little less daunting. A lot less full of flies.

Getting rid of the cabinets. They ripped out pretty easily because guess what? Genius Occupant was a horrible plumber (sadly, his day job literally WAS as a plumber) and the sink and dishwasher attachments leaked like crazy. All the leaks destroyed a decent patch of sub-floor and wicked up the wall to ruin that as well. It's a bad day when you can set down your hammer and smoosh out chunks of drywall with just your gloved hand.

We originally cut the drywall to halfway up the wall (shown on the left), where it wasn't a wet mess, but Joe wanted to add in blocking for upper cabinets and a vent hood above the stove, so we frankly gave up with any drywall salvage job in this room and just put up all new walls. Below you can see the new sub-floor, a light tan to the original sub-floor's dusty brown.
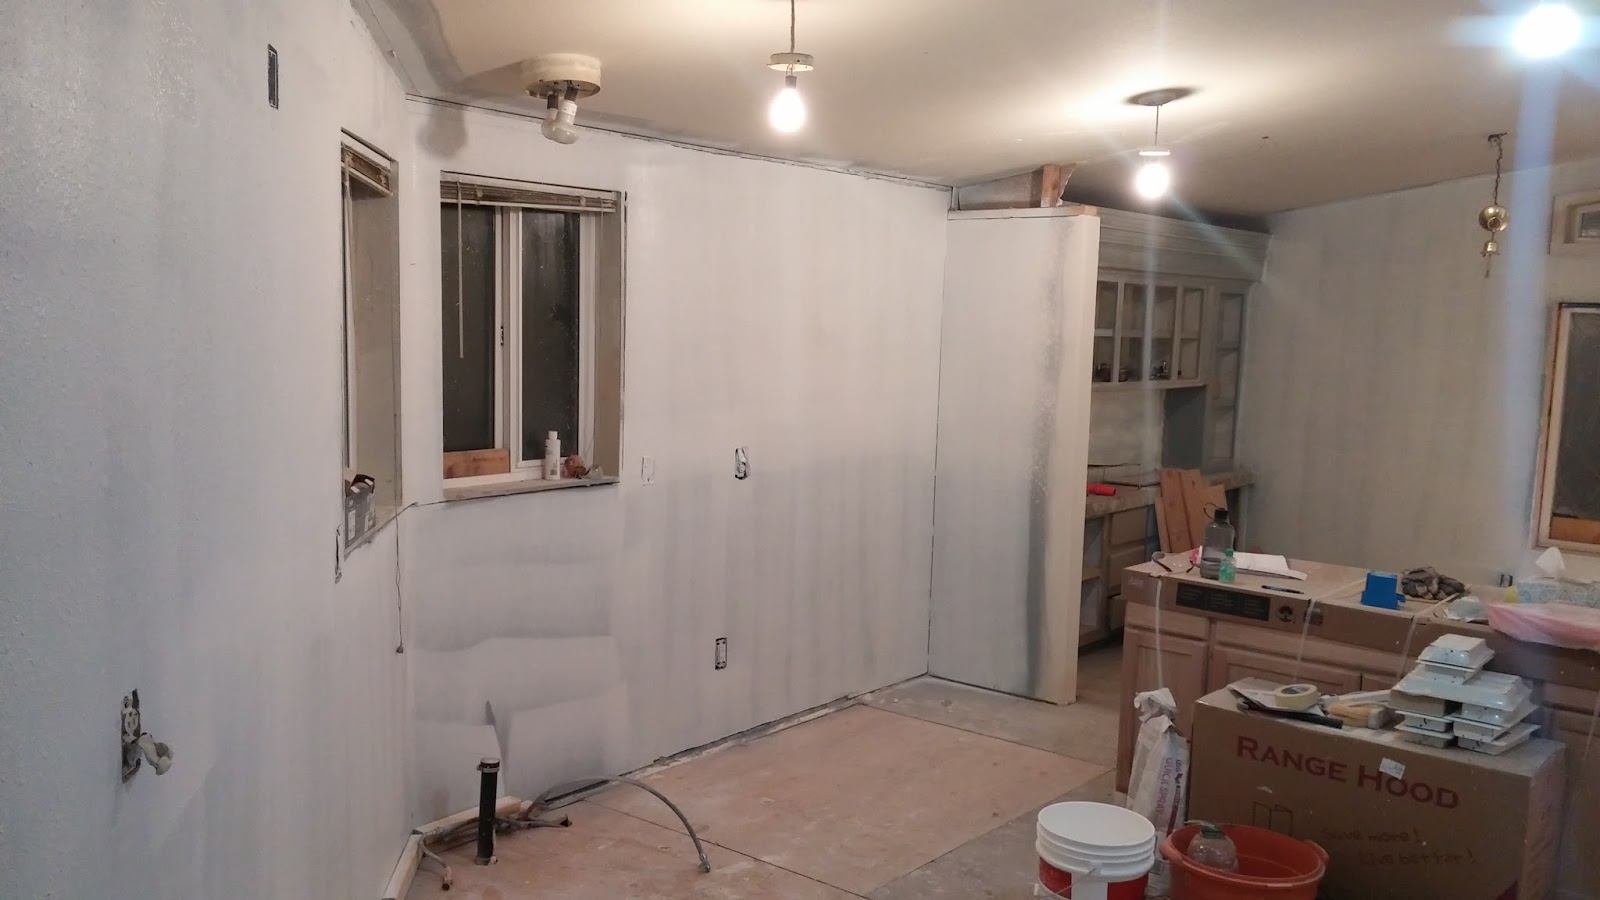
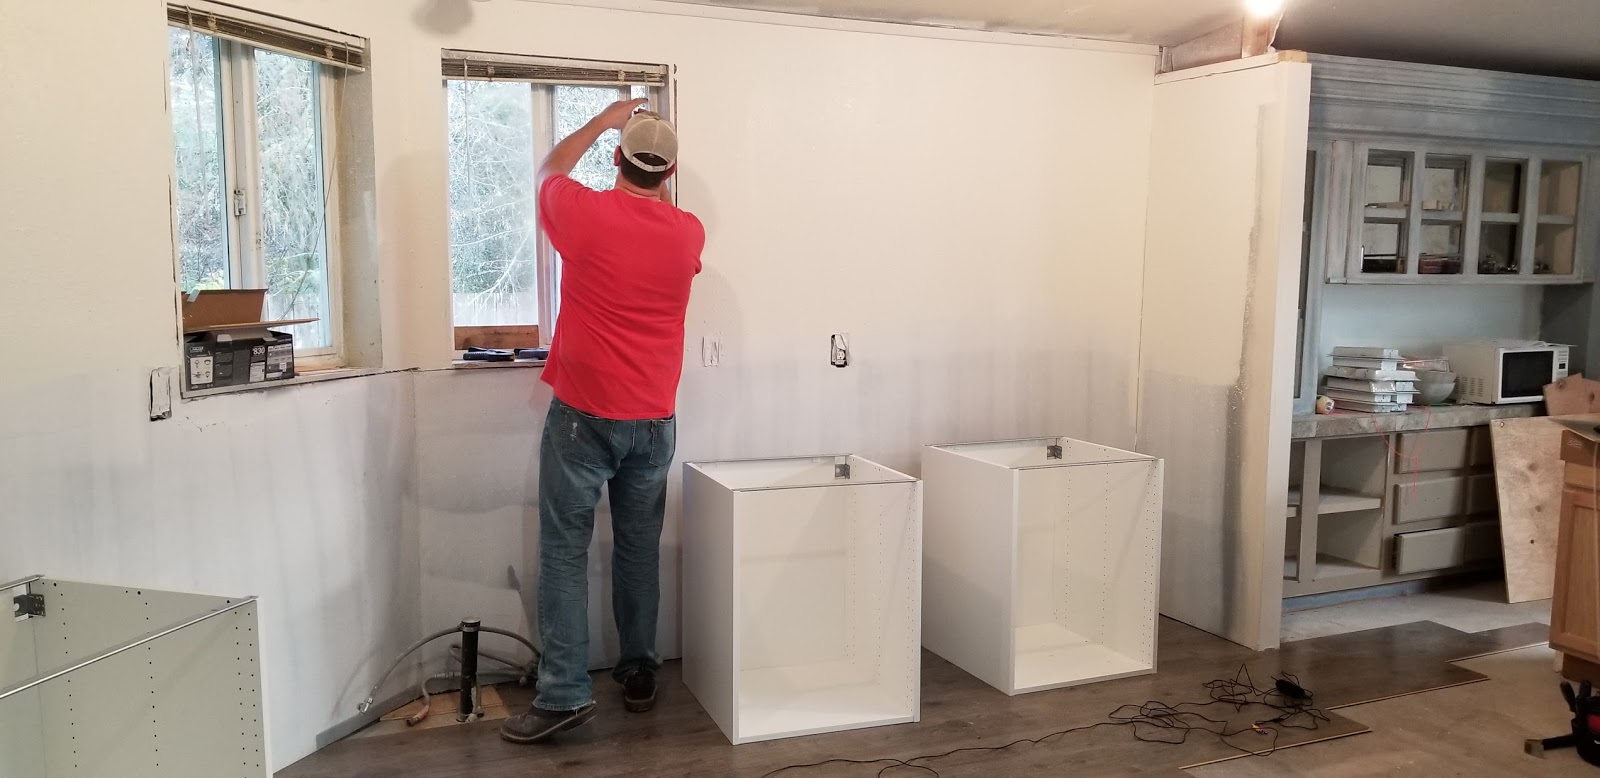
Ahhh, much better! With a proper wall in place we could put in just enough flooring (seen below) to get those new IKEA kitchen cabinets set. We would have waited until we were a bit closer to put those puppies in permanently, but we needed a template for the new countertops we ordered, which have a 3-week lead time, so in the cabinets went.
Then we covered the floor back up so we don't ruin it by walking on it in muddy work shoes. Thanks to that new blocking, the new range hood is safe, secure, and beautiful (though it had not been attached to the vent duct yet. All in good time)
The appliances arrived! It's been hectic trying to schedule things in order (Scheduling is an entire semester class in the CM program for this very reason); we ordered these seriously the week we bought the house 'cause they were on a smokin' sale, and we were a bit off on our guess of when we'd be ready for delivery. But there they are, whenever we're ready!

There's that 3-window wall the GO "renovated" that I wrote about before. It was a gaping hole for a few hours when Joe ripped it all out, but he quickly (and correctly) framed in this beauty:
Headers! King studs! A sill! Who knew lumber and plywood could look so good?! 
And then he hung new drywall, patched the seams, textured, and primed the whole thing to make it look... like nothing stupid had been done! It really is incredible how much work it has taken to make things look NORMAL. Normal is going to look really dang good in a few days, as the replacement windows we ordered were just delivered today (Dec 18th)

Joe framed in the new bedroom, and it's great! This is a view toward the closet. We were nervous about permits and inspection because there is literally ONE inspector in the area. Lots of site-built home inspectors, but this is a modular home, or Factory Assembled Structure, and they follow a different set of rules With only ONE F.A.S. inspector on hand we heard it can be a slow process, but in order to list the house as a 3 Bedroom we needed to have it be a permitted room. So wait we must. Happily, the inspector is very nice and worked to fit us in his schedule and Joe did an excellent job of framing and drywall, so we got it all passed off in one day! The room needs outlets and an overhead light, so the electrician is coming tomorrow!! Once the electrical is inspected, we are free and clear of needing other people in order to complete this house! (that alone deserves 1000 exclamation points) 
This is the outside of the bedroom, with (most of) its freshly hung drywall. Don't mind the bottom gap, it's being done as I blog. Looking into the patched and painted hallway, it's not such a scary dungeon of doom! You can walk down the hall feeling reasonably confident you won't be killed.

The next bedroom down the hall, the dinosaur room, has been patched, textured, primed, and is ready for paint. Yahoo! Again, who knew Normal was so exciting?!

The kids bathroom is now down one giant red octopus. The shower and sink were hauled to the dump, and Joe framed in the extra door that led to the laundry room and hung drywall over it. You can just barely see the patched-in wall in the right of the photo. We'll be finishing the room in a ship lap look on the walls, with a tub and white tile on the walls. Can't you just see it now? (If you can't, check back next month. I'll show you pictures)
I put Caroline to work taking photos of all the updates. I got some *wink wink* excellent photos of a broom handle, a random outlet, and here we see the edge of the bathroom mirror with sweet Caroline doing her job. I love her willingness to help!

You can also kind of see the patched-in door on the right of this picture. The other important thing you can't actually see is the furnace!! We have heat! It's new and functional and it runs like a Trane (because it is a Trane), and it's conveniently hidden by this paneling. 

Basically the masted bedroom and bath have nothing to report, and apparently we didn't take any pictures of them (good, bad, or otherwise), so let's head on out to the exterior. We got a new roof!
 You can't pull a permit to do a roof unless you have your General Contractor's license, so so we went the legit rout and had a legit roofer do it, that way there aren't any permitting issues when we go to list and sell the house. It hurt right in the bank account, but it's a big ticket item when selling so we figured better safe than sorry.

We did NOT feel sorry doing the detached garage roof ourselves, though - it saved us a few thousand dollars, it wasn't hard, and by golly anyone who looks for a permit on a roof will see that there is a permit on the roof (just not this roof in particular)
The weather held out here for an unprecedented TWO WEEKS without rain, which is how we got the house roof AND still had 2 days to do the garage ourselves. We were sincerely blessed, heaven has been looking out for us in SO MANY ways on this house.

Heaven thought it would be a pretty funny side note to freeze the paint on the garage entry door, though - it made lovely frost patterns that are permanent and don't go away with a second coat of paint. I'll get out and sand that one of the days I am bored (a.k.a. we will be selling this house with a frosty door) 


Putting it back together means we have gotten LOTS of experience just from this one property - wiring, plumbing, drywall installation, drywall patching, texturing, painting, framing, sub-floors, new flooring, tile install, insulation, permits, roofing, furnace and duct work, windows, decking, landscaping, and generally how to be a DIY Bad Ass. 

Sunday, November 19, 2017

Game Time

Let's play a game called "Guess What the Genius Occupant Filled Holes With!" It's a hilarious guessing game, and you never know when your craziest guess might be right! Let's get started.


 I spy some white patches on this wall... But wait, one kinda sticks out there. Let's guess what it could be!
 If you guess a paper towel shoved in the hole, you are correct!!


I spy a ceiling vent fan that is out of commsion, the only logical thing to do is cap it off with.... You guessed it! An empty chip bag!!

See those bumps, like the wall has mosquito bites? What do you guess is under those?

I guess more paper towels. I was wrong! If you were more creative and guessed filler from a giant, overstuffed bean bag chair, you are correct! 

 I see a large patch on the left of those graffiti words. You can't see it here but it stands about an inch proud of the rest of the wall and was feathered out (basically the wall looked 3 months pregnant there). Shall we take a guess?
 It's somenthing rectangular...
 If you guessed "a child's flash card" you are correct! And for bonus points, if you guessed the feathering was done with plaster of Paris (like for children's paint-your-own-dinosaur molds) instead of drywall compound, you are also correct!

Ahhhh, this was fun! We'll be back next time with all new odd and interesting finds from The Nut House.

Friday, November 3, 2017

The Nut House

Joe and I bought our very first investment home! Our previous two homes (one in Pueblo, one in Thornton) were both run-down and needed lots of love, but we used traditional home loans and slowly worked our way through the renovation process while living in them. With very small kids, that is a huge pain in the butt! The house we currently live in is in good shape, and we bought it that way, but our hands continued to itch for projects to work on.  We have close friends in our ward who are already doing what we have dreamed of doing: purchasing a house to flip WITHOUT living in it! They steered us to an investment group that specializes in this market (buying houses at auction and doing financing for flips) and we came up with the cash for down payments and materials, and BOOM: We bought a house.
To be more particular, we bought The Nut House
 This is an actual sign posted outside their house. We should have known.

Houses at auction show up in all kinds of states - some are occupied, some are not; some are in pretty decent shape, some are gut jobs; some have pictures from listings or from agents peeking in the windows, while some are a complete guess. Our house is consistently the worst of all these options: there were no existing pictures because it was occupied, and the occupants lived in and "renovated" that house right into a complete gut job.

Fortunately, we have this hard-working crew:
 I pay them by the job, and based on their age. I am a total cheap-skate - Ethan gets a quarter per job, or $1 for a full day's work; the boys have earned up to $10 each for the full 3-day job of ripping out the entire nasty wood floor you're about to see. Let's walk through the house, shall we? I will give handy "PRO TIPS" along the way.

Welcome! Take it all in - the mismatched siding, the windows without trim, the abandoned play structure, the patchy front lawn! And you can't see it here, but you guessed it - the whole roof needs replaced! It might have been in decent condition but the Genius Occupant (hereafter referred to as GO) had the shingles power-washed.
PRO TIP: power-washing ruins asphalt shingles. Every. Single. Time. 
 Zoom in to the (ruined) front door - it'a real wood door, you will see the GO carved "Welcome" into it with a patch of sea turtles. PRO TIP: Real wood exterior doors are expensive, and you leave your door alone except to give it a nice coat of protective varnish or oil every few years.

Once inside, GO turned the handy coat-closet into some kind of shelf-less coat-less shrine, complete with a hollow cubby decorated with stone veneers. Why? We will ask ourselves this question 184756383927 times in the process of this renovation.
Shrine comes complete with a chandelier! Maybe they hung their coats on that? 
PRO TIP: People wear coats. When your house gives you a place to hang them, keep it.

From that same vantage, turn to the right - you will see a homemade wood floor and a weirdo patch of carpet. DO NOT BE FOOLED by the wood floor looking at all decent, it is not decent. GO created this mess by patching together found flooring from all walks of life - thin, thick, wide, narrow, laminate, wood, new and old. As you might imagine, these don't fit together in a nice tight fit - although he tried! The 9000 nails attest that he did try. But "try not, do or do not" - and he did NOT succeed. In between each board was a narrow gap, and in between each narrow gap trash and foodstuffs had fallen, and in each row of disgusting foodstuff FLIES had laid thousands of eggs and eggs had turned into maggots and this floor had living maggots underneath it. 
Those two white logs are maggots, crawling around. There are two more white logs buried in the debris behind them. We found and vacuumed up hundreds of these. 
PRO TIP: People drop food, and flooring installations take this into account. Use actual flooring, don't just decide to make your own because you happen to have a saw a 9000 nails. 


Stepping into the room a bit, these 3 windows face the front of the house. Kinda nice, he did some larger trim work up at the top, maybe we could keep this? ...
...and then we removed the trim to get a rough opening on the window size... Awwww, look, GO removed the original window and cut out the king studs and header that support the weight of the wall! All so he could put in 3 very sketchy windows! The three windows are now supporting the weight of the wall, since you can see these joists don't even touch each other. Obviously, drywall will be removed so the wall can be re-framed so a normal window can be safely put into place. 
PRO TIP: Don't touch structural walls without structural knowledge and experience. Windows (and safety) are not a time to get creative!  

Well, let's keep moving - it can't get much worse, right? 
Sure. Let's move to the dining room/kitchen. We see in front of us a built-in hutch. Except that it wasn't actually built-in - the funny little pantry to the left of it was created by the GO himself, who built a wall right on top of the tile job that we're about to talk about. 
PRO TIP: When you build a wall, you join the wall structure to the floor structure, you do not set it on top of finished flooring (and I use the term "finished flooring loosely in this case). We will be un-building that cabinet.
Let's glance at that tile, shall we? Does it remind you a bit of the wood floor in that none of it matches? That's because indeed, none of it matches. All different thicknesses meant that he rigged things up however he could to try to make them even, sometimes using drywall or cement siding under a piece of particularly thin tile, sometimes using construction adhesive to glue things straight to the floor if mortar made it too thick. 
PRO TIP: Tile comes in packs of like thicknesses for ease, beauty, and safety. Buy it that way.

Further into the kitchen, GO found some castoff gray quartz counters and added them in even though they didn't fit the layout of the cabinets. You can see more of it in the wonky countertop above, supported by a middle-of-the-room non-structural post. Below, the counter was straight but the room has an angle, so the sink is just suspended between counters on both sides. We did not remove any of these doors, the GO was going for an open-air look. The black pantry door is painted, it used to be a frosted glass door that said "Pantry." Obviously black paint was the way to go, right?

From the kitchen you can see into an unfunctional room - it was originally a 2nd living room, GO semi-framed it to try to turn it into a bedroom, but he used crazy angles and has no knowledge of framing. When knocking the drywall off of it one of the studs completely fell down with the drywall, since it wasn't nailed to the header. 
PRO TIP: To make a wall you need 3 things: a baseplate, a stud, and a header. When you fail to attach these you fail to make a wall.
We will re-frame this into a 3rd bedroom for re-sale purposes, and it will right and it will be glorious. Trust me.

After you leave the brightness of the living room/kitchen/unframed bedroom this hallway looks mighty spooky. And dingy and dirty and way too patched-up. But let's proceed anyway!

 First thing on our left from the hall (same side as un-framed bedroom) there is a kids bedroom. The GO went a little mural crazy. While this dinosaur is pretty neat, it is not as neat as, say, having a door on the bedroom. Or carpet that doesn't stink like garbage. And it's only one of 4 walls...
...this garbage on the other walls is more like the rest of the room. Basically graffiti.
PRO TIP: If you think graffiti devalues a neighborhood, imagine what it does to the inside of your house!

 Right across the hall from Dino Room we have a wide open Room of Randomness and Wallpaper, wide open to the laundry room and utilities, plus a door that opens to the backyard. Very non-functional, though happily the GO seemed to leave this room alone for the most part. 

 Bonus feather duster, because they were obviously neat-freaks. But this part of the room is massive and has no clear purpose.... yet. Give us a minute to think about it.
 Mismatched washer/dryer with missing front panel? Broken cabinets? Yes, please!
 The water heater is leaking from an unknown source, and the furnace burned out (actually caught fire) 3 years ago. They never fixed it, just had it dismantled and then lived without heat. It's not Alaska up here or anything, but COME ON.
PRO TIP: If you have time to paint intricate murals (dinosaur or otherwise, as you'll see), you have time to find a part-time job; if you have a part-time job you can make money to buy a new furnace so your children have heat. (The GO's have 3 boys)

Currently the laundry/utility has a door opening (but no door in it) to the jack-and-jill style bathroom. This will be framed in and drywalled so there is only one door to the bathroom, like there should be.
PRO TIP: Your house should be a home, not a spooky maze of multiple doors to single rooms.

 Let's step through that door-less door and see what all the excitement is... I spy tentacles...
Holy shniekes, it's an octopus! What a completely normal thing to do to your bathroom!

 My, my, what a gorgeous vanity that I can't wait to throw in the dumpster
 Across from the vanity is the one mural I moderately approve of. Cute. Fun. 
Going in the trash, obviously. 

Go out through the door (literally the only remaining interior door in the house) and turn to the right, you're ready to head into the luxurious master bedroom. What better entrance than another mural? Especially one with a romantic hole kicked into it.
 And romantically filled with trash. I discovered all the chopped up foam was filling for a giant bean bag chair, ALSO very mature and romantic. There are two windows here, it just happens the left one has drywall leaning against it in this photo.The extra layer of carpet in the middle of the floor masks that there is a random hole in the subfloor. Watch out or you might fall into it with the rug and be trapped, like Tom Hanks in Moneypit!
PRO TIP: You must fix holes in rigid material with actual rigid material; an extra layer of carpet isn't fooling (or saving) anyone.

 My favorite part of the room is this spoon that was melded to the carpet with gray paint. Typical.


The master bedroom has a dedicated master bath - GORGEOUS, amiright? That is a fly trap hanging from the ceiling, and it is chock full of flies (all those wood floor maggots that grew up)
 The black sheet covers a frosted window, kind of like the black paint covered a frosted glass pantry door. Who doesn't prefer black?
And the dangly black thing on the ceiling covers a home-made skylight. For a GO who didn't know a thing about framing, he ALSO sure didn't know a thing about roofing! That homemade skylight has leaked and covered the ceiling in black mold. Time to break out the breathing masks!
There is a shower stall - possibly also their washing machine, based on the clothes we found in there.
PRO TIP: When dealing with a roof, call a roofer. Those dudes can set you up with a skylight and save you the trouble of dying from extended exposure to black mold.

Honestly, we have been so busy with demo'ing the front of the house that we have hardly touched the bathrooms. We've been in the house barely over a week and the whole wood floor, all the kitchen tiles, all the kitchen cabinets and counters and appliances have been removed.